Showing posts with label Gluten-free. Show all posts

Wednesday, November 11, 2015

Cranberry Nut Cake, Gluten Free Cranberry Nut (Pecan) Cake Recipe, Cheater's Version

Delicious Cranberry Nut Cake!

A couple weeks ago when our grandson was staying the week, we went to Carla's (of The River Flowing Blog fame) so that he could meet her two boys. They are such nice, intelligent, and fun  young men!  I had a hard time dragging our grandson away, believe me.

Well...

While we were there, Carla gave us some Cranberry Nut Cake, which, it turns out, is her younger son's favorite cake. Hmmm.  I took a bite of that cake....

I think it is now my favorite too. At the very least, it's a tie between this and my Williamsburg Orange Cake.


Fresh cranberries, a gift from Carla!

Anyway, please urge Carla to post the recipe for her delicious Cranberry Nut Cake. I decided to try to make it gluten free, but then ran short on time, not to mention my natural bent toward laziness, and went with Hodgson Mill yellow cake mixes instead.

Gluten free cake mix manufacturers have it all figured out that if they put the amount necessary to make a 13x9 cake in their box, you'd never pay what they're going to charge for it. So, they put just enough to make an 8x8 or 16 cupcakes. That will certainly not do. Who wants just a mere taste? So I bought two of them and realized that I could then make a 13x9 and have enough batter left over to make 3 mini cakes. So that's what I did.


Chopped Fresh Cranberries

Gluten Free Cranberry Nut (Pecan) Cake Recipe:  (cheaters' version)

Makes one 13x9 and 3 mini cakes (2x5 cakes, appx.)

Two boxes of Hodgson Mill Yellow Cake Mix
1 c. butter, softened
4 large eggs
2 c. buttermilk
    OR, if you don't have buttermilk, you can substitute 3 T. white vinegar and enough whole milk to make 2 cups. Wait 15 minutes. (Emeril's recipe)
2 t. vanilla extract
1 t. almond extract

(The boxes got pitched, but I'm pretty sure that the ingredients listed above are simply what was listed on the box, times two.) The following ingredients were included because Carla had fresh cranberries and pecans in her cake and that makes all the difference!)
2 1/2 cups fresh cranberries, chopped (pulsed in the food processor and tossed with 1/4 c. sugar)
2/3 c. chopped pecans  

In your mixing bowl, whip the butter. Add cake mixes and mix until well mixed. (Good grief, there's got to be a better way to write that!)

Add eggs, buttermilk, and extracts. Mix on low and then on medium-high until mixture is fluffy. 
Fold in nuts and cranberries. 

Spray a 13x9 cake pan and 3 mini (2x5) pans with non-stick cooking spray. 

Pour enough batter into the 13x9 pan to make it 1/2-2/3 full. It made the baked cake nearly level with the top of the pan. Just enough room for frosting. Divide remaining batter among the three mini pans.

Place all cakes in the 350 degree oven.

Take mini cakes out after approximately 32 minutes, 13x9 out after 43 minutes (not 43 additional, but 43 total). Do test the cakes with a wood pick to make sure they are done. Cool on baking racks.

Frost cakes (optional, of course).

Frosting:

Some butter, some confectioner's sugar, a bit of milk, and a wee bit of vanilla and an even weeer bit of almond. You'll have to wing it for I don't remember how much of anything I put in. But start with 2-3 T. soft butter and go from there. You don't want the frosting so thick that it's unspreadable or rips up the top of the cake, and you don't want it so runny that it doesn't have any body.

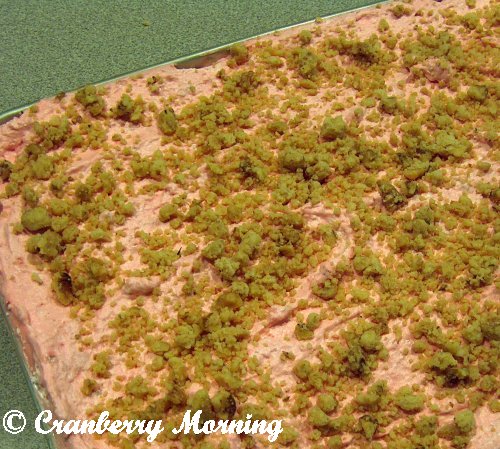
Cranberry Pecan Cake - so moist!


So if you're looking for a delicious gluten free cake recipe, look no further.  If you'd like to make it the usual way, please visit Carla and ask her to post the recipe. You can tell her I sent you to pester her. :-)


I served this cake at our recent hymn sing. I'm pretty sure that not a soul would have guessed that it is gluten free. I guess that's a good thing, considering that some people seem to know instantly that if it's gluten-free, they don't want anything to do with it. I won't mention my son's name here.


***

This post is linked to


***

Check Out All My Christmas Soaps!
Buy any 5, Get 1 FREE

'Cranberry Tea'
It seemed fitting.

...and more! Check out all my handcrafted soaps at


Wednesday, December 19, 2012

DIY Kitchen Hutch - by Joe

My Christmas Present
(just kidding)

Our son, who was married last year, has just finished his first semester in Wood Tech at WITC. He had to choose a project, design, and execute it.  After he got his grade on the hutch, he moved it to their apartment.

I am not easily impressed by new furniture, because so much of it is poorly made with cheap materials. This hutch is an exception. Made of oak and beautifully crafted (if I do say so myself), it is a piece of furniture that Joe and Courtney's children will consider a prized family heirloom. And the drawers are even dove-tailed!! Love that!

We went to see it yesterday, and I had to keep running my hands over the smooth finish. Anyway, to spare you any more bragging by a very impressed mom, I'll move on to something else...

***

We're taking our daughter and SIL halfway to Green Bay today, where we're meeting Gus's family so that they can spend the next days with them. We had fun putting up the tree, baking Christmas cookies, and just spending time with them.

Spritz Cookies
Dairy-free, Gluten-free, Corn-free, Soy-free

Note about the cookies: I typically bake with Real Wisconsin butter, so they did not taste the same. BUT, when they were baking, our kitchen smelled just like our local bakery - which means that they must use palm oil shortening instead of butter. Personally, I don't mind the gluten-free variety, but if I were making them for me, they would contain butter. There is no substitute. But they did provide a good alternative for our daughter and our son-in-law who have those particular food allergies.

***

I'm hoping to get some knitting done on the little road trip today. It should keep my mind off the snow storm that is coming to Wisconsin today.

I hope you all have a busy, enjoyable, and productive day!

***
Buy Five - Get One FREE Sale
on all our handcrafted, vegan soaps


Sale ends midnight, December 19.

We're extending this sale through December 31.
Don't miss out!

Great for stocking stuffers!
Sale at:

HomemadeSoapnSuch.com

Large, handcrafted vegan luxury soaps

...and more! Check out all our handcrafted soaps at


Photobucket

Monday, October 1, 2012

Pumpkin Cheesecake Recipe - Gluten Free


Happy Pumpkins

Some of my Cranberry Morning readers may remember this post, but I thought it was time to share it again. If you like pumpkin, I'm pretty sure you'll love this cheesecake! What's really fun is to serve both the Caramel Apple Cheesecake and the Pumpkin Cheesecake - both great autumn desserts.

 Pumpkin Cheesecake, just out of the oven


Caramel Apple Cheesecake and Pumpkin Cheesecake,
Chilled and ready to serve


For this photo, I snitched just a wee slice before guests arrived.
It's amazing what lengths one will go to for a blog post!


Pumpkin Cheesecake - Gluten Free, Recipe:

Ingredients:

1 pkg. Gluten-free ginger snaps, crushed (about 1.5 cups crumbs). I bought Mi-Del from Walmart
3/4 c. ground hazelnuts
3 T. brown sugar
6 T. unsalted butter, melted

Preheat Oven to 325 degrees F. Grease (cooking spray) a 9-inch springform pan.

Toss gingersnaps, hazelnuts, brown sugar, and melted butter until mixed. Press this mixture onto the bottom and a little up the sides of the springform pan.

Filling:
3   8-oz. packages of cream cheese, softened
1 c. brown sugar
1 1/2 c. canned solid pack pumpkin
1/2 c. heavy whipping cream
1/3 c. maple syrup
1 T. vanilla extract
3/4 t. ground cinnamon
1/2 t. ground allspice
4 eggs


With an electric mixer, beat the cream cheese and brown sugar until fluffy. Stir in pumpkin. Mix in the cream, maple syrup, cinnamon, allspice, and vanilla. Beat eggs in, one at a time. Mix all until smooth.

Pour batter into prepared crust (above). I also set it on a cookie sheet because my springform pan was filled right to the top. I was supposed to bake it in the preheated oven for 90 minutes, but it took a good 120 minutes before it was done enough.

Remove from oven and allow to cool in pan for an hour, then refrigerate several hours before serving. I made mine in the afternoon of one day and served it the evening of the next day, so it was well chilled.

I'm kinda on a cheesecake kick. I hope it doesn't last long. I don't want to have to purchase an entire new wardrobe!

This is a great recipe to serve guests. 
See how small those pieces are cut?
That way, they can have one of each!


***


'English Rose'

...and more! Check out all my handcrafted luxury soaps at
HomemadeSoapNSuch


 You'll find me at These Linky Parties:
Mop it Up Monday   and Mix it up Monday and Make it Pretty Monday and The Chicken Chick and   What's in the Gunny Sack and  Making the World Cuter Mondays and Make the Scene Monday and  Make it Great Monday and Made By You Monday and  Something I Whipped Up Monday and  Motivate Me Monday and  Making Monday Marvelous  and  Get Your Craft On and Tip Me Tuesday  and  Inspiration Board and You're Gonna Love it Tuesday and  Take a Look Tuesday and  Tasty Tuesday and Tasty Tuesday and  Tempt My Tummy Tuesdays  and Two Maids a Baking and What's Cookin' Wednesday and DJs Sugar Shack and  Cast Party Wednesday and The Shady Porch and   We Did it Wednesday  and It's a Party at Creative Princess and Mom on TimeOut and  Link it Up Thursday and It's Fall Y'all and Crafty Friday (Thursday) and Mandatory Mooch and  Petals to Picots and  Threading Your Way and Lisa's Gluten-Free Blog  and I'm Lovin' it Friday and Maiden d'Shade and It's a Hodgepodge Friday  and Foodie Friends Friday and Creative Bloggers and  Serenity Saturday and Overflowing With Creativity and  Home and Family Friday 


Photobucket

Monday, September 3, 2012

GF Chicken Sausages and Sweet Potatoes, Recipes

A quick and easy dinner!

When we were visiting our daughter and family in Indiana, she served us grilled chicken sausages. I couldn't imagine sausage of any kind sitting well in my stomach, and I questioned her on it. She  said they were gluten free and didn't have any poisonous additives and preservatives. Nevertheless, I proceeded cautiously. To my delight, they tasted great and I didn't get a headache or any of the other nasty symptoms that come from poison in my food.

The brand is Alfresco.


I just signed up for the Alfresco newsletter in order to get free coupons. Info on the newsletter is in their FAQ section.

The sausages pictured in the first photo are actually ones we had for dinner the other night. I didn't want to take time to get the grill ready*, so I sliced them in half and pan fried them in a little olive oil.

The Sweet Potato and Yukon Gold Fries were simply sliced thin, then tossed in a ziploc baggie with a little olive oil and spread out on a jellyroll pan. I sprinkled the minutest amount of brown sugar on them, and then sea salt and pepper, then baked in a 450 degree oven until tender but crispy on one side. I've done this before without the brown sugar and liked it better then. The brown sugar idea was from The Barefoot Contessa. She's got a ton of good ideas, but I didn't think this was one of them.

The salad was a combination of cherry and regular garden tomatoes, fresh basil, fresh oregano, and fresh zucchini, pared and cubed, (oops, I guess that was the next night!) then tossed with a tiny bit of olive oil and sprinkled with sea salt.

I loved this dinner and would be happy to make it a regular!

*As good as these were pan fried, they taste way better on the charcoal grill.

P.S. Update: I scheduled this more than a week ago. The boys go home today. It has been a sweet and fun (albeit a bit exhausting) time with them. I will miss the funny things the 5 year old says, the sweet hugs and kisses from the 2 year old, and the knowledge that the 8 year old is perfectly capable of ruling the world, or at least a John Deere dealership. 

Bridger and Misty will spend the next two days sleeping.

***

'English Rose'

...and more! Check out all my handcrafted soaps at
HomemadeSoapNSuch


  You'll find me at These Linky Parties:
Mop it Up Monday   and  What's in the Gunny Sack and  Making the World Cuter Mondays and Make the Scene Monday and  Make it Great Monday and Made By You Monday and  Something I Whipped Up Monday and  Motivate Me Monday and  Making Monday Marvelous  and  Get Your Craft On and Tip Me Tuesday  and  Inspiration Board and You're Gonna Love it Tuesday and  Take a Look Tuesday and  Tasty Tuesday and Tasty Tuesday and  Tempt My Tummy Tuesdays  and Two Maids a Baking and What's Cookin' Wednesday and DJs Sugar Shack and  Cast Party Wednesday and The Shady Porch and   We Did it Wednesday  and It's a Party at Creative Princess and Mom on TimeOut and  Link it Up Thursday and Crafty Friday (Thursday) and Mandatory Mooch and  Petals to Picots and  Threading Your Way and Lisa's Gluten-Free Blog and Favorite Things Friday and I'm Lovin' it Friday
and Maiden d'Shade and It's a Hodgepodge Friday  and Foodie Friends Friday and Creative Bloggers and  Serenity Saturday and Overflowing With Creativity and  Home and Family Friday 
Photobucket

Monday, May 7, 2012

My Favorite Sandwich - Gluten Free

 Oven-roasted beef and pepperjack cheese

Some of you may look at this and refuse to put beef OR cheese into your body. You're also seeing what you think is a marbling of fat in that beef. I'm sure it's just scratches on the photograph. ;-) This sandwich has amazing flavor and great sources of protein.

You know that slump you often get at 2 or 3 o'clock in the afternoon? Eating this at noon keeps it from occurring.


My daughter was right. It IS a good sandwich bread!

I would not use Udis for toast, for it's very light-weight and I like a dense slice of toast. For toast, I prefer my own homemade gluten-free bread. Follow this link to find my Homemade Gluten-free Bread Recipe. 

But Udis sandwich bread is great as a beef and cheese holder. 

And now, for the key ingredient:


 The magic ingredient!

I went to the Silver Spring Foods website to get the lowdown on their horseradish. Here's what they say in answer to the gluten question:

Are your products gluten free?
As you may be aware, the FDA has proposed a definition for "gluten-free" that prohibits the inclusion of specific "prohibited grains" and mandates the product contain less than 20 parts-per-million of gluten (www.fda.gov). Our products satisfy both of those requirements. If you remain concerned about potential trace amounts of gluten as allowed by the FDA's definition, we encourage you to consult with your physician.

It's an amazing sandwich. I hope you'll try it, and be sure to let me know how you like it. :-)


Photobucket
...and more! Check out all my handcrafted soaps at

Tuesday, July 5, 2011

Raspberry Freezer Dessert - Gluten Free


I'm re-posting this dessert recipe because it's another of my favorite gluten-free desserts and is perfect for this time of year, whether you use raspberries or strawberries.

I really like my deep red KitchenAid mixer. :-)

This dessert is light and delicious and gluten-free. Of course you can substitute regular flour for the tapioca and white rice flours I use in the recipe.


Crumble Ingredients:
1/2 c. white rice flour
1/2 c. tapioca flour
1/2 c. soft butter
1/4 c. brown sugar
1/2 c. chopt walnuts

Cut butter into flours and sugar. Stir in walnuts. Spread the crumbles on a cookie sheet that has been sprayed with a GF cooking spray and bake at 350 degrees for 10-18 minutes. Stir a couple times while baking, and bake until the crumbles are golden brown. (Mostly golden. Less brown.) When done, cool crumbles and set aside 1/2 c. to use later as a sprinkling for the top of the dessert. Spread the remaining crumbles evenly in the bottom of a 13 x 9 x 2 cake pan.


Meanwhile, beat 2 egg whites until stiff. As you can see, the two egg whites get kinda lost in the bottom of the KitchenAid bowl, but they do eventually fluff up and stiffen.


To the stiff egg whites in the mixer bowl add:
1 c. sugar
2. t. fresh lemon juice
16 oz. FROZEN raspberries


Beat 20 minutes. This grows a lot during beating. It may completely fill your mixer bowl.

Now, fold in an 8 oz. tub of Cool Whip. You can see I switched to a large, stainless steel pan. There's too much volume to fit into the mixer bowl.


When the Cool Whip is completely folded in, spread it on the layer of crumbles in the cake pan. Use the reserved 1/2 c. of crumbles to sprinkle over the top. Cover with a lid and freeze overnight. Remove from the freezer a few minutes before serving.


So far, I've not met anyone who doesn't like this! :-) So grab a fork!


P.S. You can use the same recipe with strawberries, but the strawberries should be partially frozen, not completely frozen, when used for the recipe.


This post is linked to: Making the World Cuter Mondays and Something I Whipped Up Monday and  Motivate Me Monday and Making Monday Marvelous and Made from Scratch Tuesday and Delectable Tuesday and Anything Related Tuesday and Take a Look Tuesday and Tasty Tuesday  and Tempt My Tummy Tuesdays  and Wandering Wednesday and What's Cookin' Wednesday and We Did it Wednesday and Thrilling Thursday and Lisa's Gluten-Free Blog and Favorite Things Friday and I'm Lovin' it Friday and It's a Hodgepodge Friday  and Fat Camp Friday and Fun With Food Friday

Photobucket

Tuesday, February 1, 2011

Easiest Chicken Parmigiana


The ingredients shown below are among those I try to keep on hand at all times:
Parmesan cheese, black olives, Classico pasta sauce, onions, garlic, canned sliced mushrooms, canned chicken breast, Gluten-free pasta of some sort (in this case rotini), and mozzarella cheese.

I know, we all like really fresh ingredients, but this little group of canned goods is great to have on hand for those times when you get home, it's nearly time for dinner, and you know you're going to open that bag of chocolate chips if you can't come up with something pretty fast!


This is so simple, I'm sure it shouldn't qualify as a recipe. Then again, it's a couple levels up from plain old Mac'n'Cheese in a box!


Easiest Chicken Parmigiana:

Cook gluten-free rotini according to package directions. I like Tinkyada. It's my favorite.

Saute a chopped onion and minced garlic in a T. olive oil.

Place cooked, drained rotini in a large bowl. Add in the onion and garlic. Mix in drained canned chicken which has been broken up with a fork. Pour pasta sauce on top, add drained and sliced black olives, drained sliced mushrooms, and 3/4 c. grated Parmesan cheese. Stir carefully so that you can mix all the ingredients without breaking up the pasta.

Place half of the mixture into a baking dish that's been sprayed with cooking spray. Sprinkle shredded mozzarella cheese over the top. Make a second layer with the remaining chicken/pasta mixture.

Cover with a lid or aluminum foil and bake at 350 degrees for 35-45 minutes until bubbly at edges. Remove cover and sprinkle more shredded mozzarella cheese over the top. Return to oven, uncovered, to melt the cheese and bring it to just slightly golden at the edges.

Serve with a green salad.

This is definitely comfort food.


Don't forget to enter my handcrafted soaps giveaway. It closes tomorrow at midnight and I will announce the winner on Thursday's post.


This post is linked to Tempt My Tummy Tuesday
and Tasty Tuesdays
and Tasty Tuesday Parade of Foods
and Tuesdays at the Table 
and What's Cooking Wednesday
and Lisa's Gluten Free Food and Health Blog
and Fun with Food Friday
and Fat Camp Friday


Tuesday, January 18, 2011

Sirloin with Broccoli and Carrots

You're probably starting to think that all my dinner meals look alike. I'll have to admit that very often I start with a piece of steak or chicken and add various combinations of vegetables. For example, I like to buy sirloin and package it in roughly 1.5 pound packages, then freeze it for later use.

This Sirloin with Broccoli and Carrots dinner is so delicious and so easy to make. The key is to think ahead in the morning, so you can move the frozen sirloin from the freezer to the refrigerator, then it will be just right for slicing very thin just before dinnertime. That way I never have to slice squishy meat, for who likes to do that!

Ingredients:

1.5 pounds of beef sirloin, sliced in very thin strips
Fresh broccoli, cut into chunks
Fresh carrots, cut into  1/8 inch slices
Olive oil
Celery, cut in 1/3 inch chunks
Fresh mushrooms, sliced
Garlic, 1 clove, minced
Onion, 1, sliced
Red peppers (bell), diced
Sea salt
Coarse-ground black pepper
Cayenne
Lightly salted Planters Peanuts (other brands have so many additives and preservatives!)

Sauce: (Stir ingredients together)
1/2 c. Kitchen Basics (GF) Beef Broth
1 t. honey
1/4 c. burgandy
1+ T. corn starch

Procedure:
Steam sliced carrots and broccoli for a few minutes until the color is darker. You don't want them overcooked and squishy. Set aside.

Stirfry beef and garlic in olive oil until only slightly pink in the center. Remove to a plate.

In same skillet, stirfry celery, onion, and red peppers.

Add beef and garlic, carrots and broccoli back into the skillet. Add mushrooms.

Mix sauce and pour over contents of skillet. Cook on low until sauce is translucent.

Sprinkle with sea salt, black pepper, cayenne to taste. We like ours kinda hot.

Serve peanuts in a dish separately. You don't want to eat leftovers containing soggy peanuts!

Serve with brown or basmati rice. I'm trying to learn to simply sprinkle a little rice on top, rather than serving this stirfry over a bed or rice OR, better yet, to avoid the rice altogether. It's not like the vegetables don't have enough carbs.  You can see I didn't manage to do that this time, however. :-(


Planters - lightly salted, dry roasted...YUM


And here's the final product:


It's delicious. Then all you need is a little piece of 88% dark chocolate for dessert (like Endangered Species' Black Panther!)


This post is linked to Tempt My Tummy Tuesday
and Tasty Tuesdays
and Tasty Tuesday Parade of Foods
and Tuesdays at the Table 
and What's Cooking Wednesday
and Lisa's Gluten Free Food and Health Blog
and Fun with Food Friday
and Fat Camp Friday

Tuesday, October 5, 2010

Pumpkin Cheesecake!

Pumpkins from our garden
I did not use them for the cheesecake
a. They were too cute
b. I like to use pie pumpkins for baking
c. Canned pumpkin is easier


 Pumpkin Cheesecake, just out of the oven


Chilled and ready to serve
Autumn Apple cheesecake recipe was from Sherry at Lamp Unto My Feet. I only made it gluten-free. Both cheesecakes are delicious!


For this photo, I snitched just a wee slice before guests arrived.
It's amazing what lengths one will go to for a blog post!


So finally, here's the recipe for Gluten-free pumpkin cheesecake:

Ingredients

1 pkg. Mi-Del (why do I always first think Midol??) Gluten-free ginger snaps, crushed. I find these at WalMart. Makes about 1.5 cups of crumbs. After I'd munched a few of the ginger snaps out of the bag, I had about the right amount remaining. Works out so well!
3/4 c. ground hazelnuts
3 T. brown sugar
6 T. unsalted butter, melted

Preheat Oven to 325 degrees F. Grease (cooking spray) a 9-inch springform pan.

Toss gingersnaps, hazelnuts, brown sugar, and melted butter until mixed. Press this mixture onto the bottom and a little up the sides of the springform pan.

Filling:
3   8-oz. packages of cream cheese, softened
1 c. brown sugar
1 1/2 c. canned solid pack pumpkin
1/2 c. heavy whipping cream
1/3 c. maple syrup
1 T. vanilla extract
3/4 t. ground cinnamon
1/2 t. ground allspice
4 eggs


With an electric mixer, beat the cream cheese and brown sugar until fluffy. Stir in pumpkin. Mix in the cream, maple syrup, cinnamon, allspice, and vanilla. Beat eggs in, one at a time. Mix all until smooth.

Pour batter into prepared crust (above). I also set it on a cookie sheet because my springform pan was filled right to the top. I was supposed to bake it in the preheated oven for 90 minutes, but it took a good 120 minutes before it was done enough.

Remove from oven and allow to cool in pan for an hour, then refrigerate several hours before serving. I made mine in the afternoon of one day and served it the evening of the next day, so it was well chilled.

Which reminds me: Once I was in a restaurant in Stillwater, MN and ordered cheesecake. The server actually warmed it in the microwave before serving it to me. What?? She was young and ignorant. What more can I say. (well, plenty, but I won't.)

I'm kinda on a cheesecake kick. I hope it doesn't last long. I don't want to have to purchase an entire new wardrobe!

This is a great recipe to serve to guests. 

This post is linked to Tempt My Tummy Tuesday
and Tasty Tuesday
and Tasty Tuesday Parade of foods
and Tuesdays at the Table
and Tuesday Tag-Along

LinkWithin

Related Posts with Thumbnails