Showing posts with label food. Show all posts

Thursday, September 15, 2011

Carmen Peppers

 Carmen Peppers

Just in case I haven't made it clear to everyone, Carmens are my favorite peppers. I've raised Carmens from seed for the past few years. I still plant jalapenos, poblanos, Anaheims, and cayenne, but if I could only take one pepper plant to a desert island, it would be Carmens. They're huge, sweet, and prolific. I've had more than one plant that's produced 25+ peppers!


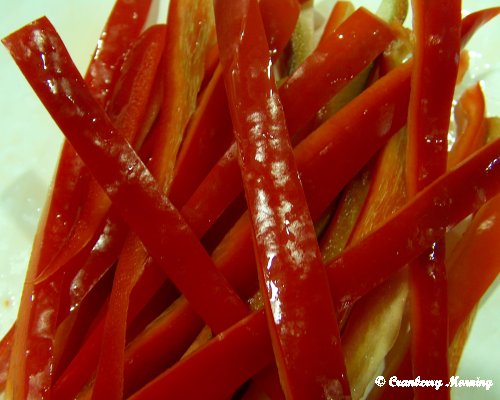
Peppers sliced and ready to be dehydrated


The amazing but simple Nesco dehydrator
All the shelves simply stack beneath the lid which contains the heating element


Pepper Threads

About 18 hours later... and yes, I did get busy and forgot about them. But I dehydrate almost everything longer than they recommend. I want things dry enough so they don't mold later. My pepper threads will be used in soups and stews.


 I wanted to show you relative size.
I couldn't help thinking, when seeing the photo,
that even Carmen peppers go farther than our dollar these days.

Last night, we had to cover our peppers, tomatoes, and any plants we didn't want to get killed by frost. (We have a threat of frost for two nights in a row) There's a limit to how many sheets and blankets one has available to cover plants, and there should be a limit on how many plants I want to rescue. I think I've got 15 plants that are coming indoors for the winter, but we will be getting some warmer weather after tomorrow, so I'll wait til later to bring them in. In the meantime, I'm going to have to figure out where on earth I'll put them all.


Photobucket

Tuesday, February 1, 2011

Easiest Chicken Parmigiana


The ingredients shown below are among those I try to keep on hand at all times:
Parmesan cheese, black olives, Classico pasta sauce, onions, garlic, canned sliced mushrooms, canned chicken breast, Gluten-free pasta of some sort (in this case rotini), and mozzarella cheese.

I know, we all like really fresh ingredients, but this little group of canned goods is great to have on hand for those times when you get home, it's nearly time for dinner, and you know you're going to open that bag of chocolate chips if you can't come up with something pretty fast!


This is so simple, I'm sure it shouldn't qualify as a recipe. Then again, it's a couple levels up from plain old Mac'n'Cheese in a box!


Easiest Chicken Parmigiana:

Cook gluten-free rotini according to package directions. I like Tinkyada. It's my favorite.

Saute a chopped onion and minced garlic in a T. olive oil.

Place cooked, drained rotini in a large bowl. Add in the onion and garlic. Mix in drained canned chicken which has been broken up with a fork. Pour pasta sauce on top, add drained and sliced black olives, drained sliced mushrooms, and 3/4 c. grated Parmesan cheese. Stir carefully so that you can mix all the ingredients without breaking up the pasta.

Place half of the mixture into a baking dish that's been sprayed with cooking spray. Sprinkle shredded mozzarella cheese over the top. Make a second layer with the remaining chicken/pasta mixture.

Cover with a lid or aluminum foil and bake at 350 degrees for 35-45 minutes until bubbly at edges. Remove cover and sprinkle more shredded mozzarella cheese over the top. Return to oven, uncovered, to melt the cheese and bring it to just slightly golden at the edges.

Serve with a green salad.

This is definitely comfort food.


Don't forget to enter my handcrafted soaps giveaway. It closes tomorrow at midnight and I will announce the winner on Thursday's post.


This post is linked to Tempt My Tummy Tuesday
and Tasty Tuesdays
and Tasty Tuesday Parade of Foods
and Tuesdays at the Table 
and What's Cooking Wednesday
and Lisa's Gluten Free Food and Health Blog
and Fun with Food Friday
and Fat Camp Friday


Tuesday, October 19, 2010

Italian Plum Pie

One of the guests at our Italian dinner party pot luck (that's a mouthful!) brought this delicious Italian Plum Pie, made from her grandma's recipe. Doesn't it look amazing? Well, it was, so I asked her if she would share the recipe with me so that I could pass it on to you.

In an unbaked 9-inch pie crust*, layer 12 or so Italian prune plums, washed, pitted, and quartered. She said to make sure to use the Italian prune plums, for other plums are too juicy to work well in this recipe.

Mix in large bowl :
2 eggs
1 1/2 c. sugar
2 T. flour
3 dashes of nutmeg (a dash is a very subjective thing, but I'd put in maybe 1/8 - 1/4 t.)

Spread the mixture over the plums and bake in a 350 degree oven for about 50-60 minutes, until filling is golden brown.

*She did not pass on the crust recipe, so I will give you the one that my own mother gave me:

For a single-crust pie (8, 9, or 10 inch)
1/2 c. flour
1/2 t. salt
1/2 c. shortening
6 T. cold water

Combine the flour, salt, and shortening. Work either with a pastry blender or your fingers until VERY fine. Then sprinkle on the water, a bit at a time as you continue to mix. Do not over-mix this dough. My mom always told me that over-mixing is what causes a crust to become tough. 

With your hands, form dough into a ball, then flatten out on a floured counter. Roll with a cloth-covered and lightly floured rolling pin until the dough is in a nice disk shape that's about 1/8 inch thick. The trick with pie crust is to lift it up after each time you roll it and lightly re-dust the counter top with flour.

You can use the excess to form strips, sprinkle them with cinnamon and sugar, and bake in the oven until just starting to turn golden around the edges. The kids will love these! Mine always did. :-)

Check out my 5-Bar Handcrafted Soap'n'Such Giveaway. Ends Friday night, Nov. 18, 2011.

This post is linked to: Making the World Cuter Mondays and Something I Whipped Up Monday and  Motivate Me Monday and Making Monday Marvelous and Made from Scratch Tuesday and Made by You Mondays and Delectable Tuesday and Anything Related Tuesday and Take a Look Tuesday and Tasty Tuesday  and Tasty Tuesday and Tasty Tuesday and  Tempt My Tummy Tuesdays  and Two Maids a Baking and  What's Cookin' Wednesday and Cast Party Wednesday and  It's a Party at Creative Princess and Lisa's Gluten-Free Blog and I'm Lovin' it Friday

Monday, October 11, 2010

Italian Dinner Party Potluck

We had such a fun time when our friends joined us recently for an Italian dinner party pot luck. The week before the party, I ordered several CDs of Italian music through inter-library loan and settled on Dean Martin Italian Love Songs and another CD, Viva Italia, popular Italian songs along with the mandatory (in my mind) mandolin.


 Setting the mood 
my new candy corn candle from Country Cabin


 Some of our younger guests
Don't you love that hat!!!


When Dean got tired of crooning in Italian, we were serenaded by this lovely young lady and her harp.


 Italian Plum Pie - it was delicious!!
made by the same young lady who played harp


All dressed for a party!


What do we do when we get together? Well, we discuss the amazing grace of God and politics and knitting and books, act silly, eat great food, and enjoy each other's company. Sometimes we play word games.

And now, of course, I realize that I didn't take any pictures of those men who were sitting out in the kitchen! They managed to evade the roving camera.
Last, but not least, the FOOD:

Counter clockwise from left: Pistachio Jello, Spaghetti with anchovies, Stuffed shells, Italian club soda, focaccia.


From front: Tuscan Chicken Stew, Italian sausage soup, bowties, and sauce for a delicious beef roast!


 Desserts: Pumpkin cheesecake, apple cheesecake, Italian plum pie


Couldn't resist taking a photo of Kate's cute shoes :-)


Recipe for Tuscan Chicken Stew coming tomorrow!

This post is linked to Making the World Cuter Mondays
and Meet and Greet Monday
and Motivate Me Monday
and Just Something I Whipped up Monday

P.S. We are currently traveling, but I wanted to schedule this to publish today.

Tuesday, September 14, 2010

Delicious Roasted Veggies

The above combination of vegetables makes a delicious side dish for chicken or beef. I realize that parsnips are not a foreign product, but I had not roasted parsnips until a friend of ours from Herefordshire, England, served them to us when we visited their home.

Now I use parsnips often, and have even raised them in my garden the past two years. They're amazing. They grow like carrots, except they're very long!! I'm sure they're something that Bilbo and his friends ate for dinner. I think parsnips are best in a mixture like this, and definitely roasted so that they're browned and crispy on the edges. Parsnips have a sort of 'perfumey' quality to them. (My spell checker is questioning this, but it's also questioning Herefordshire, so I don't consider it to be reliable anyway.)

As you can see, the mixture I used was the following:
  • Sweet potatoes, pared and cut into chunks
  • Carmen (or red bell) peppers, seeded and cut into large pieces
  • Potatoes, scrubbed and cut into chunks. I like to leave the skin on.
  • Onion, peeled and cut into chunks
  • Parsnips, pared and cut into smaller chunks, for they take longer than potatoes to cook thoroughly

Put the above ingredients into a large Ziploc baggie and pour 1/4 c. (or less) olive oil into the bag. Shake until oil coats all veggies. Pour out onto a large jelly roll pan.

Sprinkle with coarse pepper, garlic powder, sea salt, and a little cayenne.

Bake in a preheated 400 degree F. oven for 30 - 45 minutes, and it's a good idea to turn these over at mid point so that both sides will get crispy.

And here is the result -
Delicious!!!

***


Andalusia
100% Pure Olive Oil Soap

...and more! Check out all my handcrafted soaps at


You'll find me at These Linky Parties:
Mop it Up Monday and French Obsession and  Skip to My Lou and Bedazzle Me Monday and  What's in the Gunny Sack and  Making the World Cuter Mondays and Make the Scene Monday and  Made By You Monday and  Something I Whipped Up Monday and  Motivate Me Monday and  Making Monday Marvelous and Cozy Home Scenes and  Get Your Craft On and Tip Me Tuesday and Inspiration Board and  Your Home Cozy and You're Gonna Love it Tuesday and  Made from Scratch Tuesday and  Take a Look Tuesday and  Tasty Tuesday and Tasty Tuesday and  Tempt My Tummy Tuesdays  and Two Maids a Baking and What's Cookin' Wednesday and Exodus 35 and Cast Party Wednesday and The Shady Porch and   We Did it Wednesday  and It's a Party at Creative Princess and Link it Up Thursday and Crafty Friday (Thursday) and Threading Your Way and Lisa's Gluten-Free Blog and Favorite Things Friday and I'm Lovin' it Friday and It's a Hodgepodge Friday  and Creative Bloggers and  Serenity Saturday and Overflowing With Creativity and  Home and Family Friday

 
Photobucket


Monday, September 13, 2010

Carmen

Carmen and Rudbekia

This spring I planted tomatoes and peppers from seed. I raised jalapenos, poblanos, and Carmens. I think all of them were from Burpee Seed, and the Carmens were labeled as a sweet, red Italian pepper. I have always wanted to raise red bell peppers, but they never ripen for me. This year I decided to give Carmens a try, although I had little hope of success.

What a surprise when these peppers began turning red the beginning of September! I was thrilled! Not only do they have a mild, sweet peppery taste, but they are beautiful. I love them when they are crispy fresh, as well as frozen for winter soups and stews.


So what was the secret to raising these amazing (and prolific) pepper plants? I'm sure it must have been the incessant rain we had. I've read that peppers need a lot of moisture, and they certainly got that in NW Wisconsin this year!


Maybe you're getting a little sick of all this red, but I couldn't help myself. After I washed and seeded the peppers, I cut them into strips and then diced them to put on a cookie sheet which I then put into the freezer.


Once they were frozen, I gathered them into gallon Ziploc freezer bags, so that it will be easy to measure out a cup of peppers for a recipe.


All that hard work of seeding, slicing, and dicing really worked up an appetite. :-) Peppers are also delicious dipped in cream cheese!  And I wonder why the scale has steadily crept up during the past few months!


This post is linked to  Making the World Cuter Mondays
and Meet and Greet Monday
and Motivate me Monday
and Just Something I Whipped Up

Tuesday, August 31, 2010

Tomato Haiku

Raised from seed, every single one survived. How could I throw any away??

Looking hopeful

Hunter, Gatherer

Finishing ripening on the picnic table

Ready for the canner

Here we go again

All have sealed. Yea!!!


I think it was Kim's blog, Consider it Pure Joy , that used Haiku some months ago. It was so much fun. So, if you have any gardening Haiku of your own, be sure to share it in a comment!  We'd all love to read it! :-)
Here are a couple of my lame (trust me, I came up with even worse ones!) tomato Haiku offerings:

Tomato Canning
Pick them, cut them, put in jars
Shelves of gorgeous red

OR:


Plant with many hopes
Dreams of Deep red, seedy fruit
Reality: blight


This post is linked to Tempt My Tummy Tuesday
 

Tuesday, August 17, 2010

Waffle Turtle Cookies! Gluten Free


These cookies are fun to make, easy, cute, and would be a great project with the kids.

Ingredients:

4 oz. Semi-sweet Chocolate Chips
2/3 c. butter
Melt these together. 


Then stir in:
3 c. GF flour (I use a combination of 2 c. white rice flour, 2/3 c. tapioca flour, and 1/3 c. potato starch)
1 c. sugar
1/2 c. milk
1 t. vanilla
2 eggs, beaten


Spray waffle iron with a gluten-free cooking spray. Pre-heat to LOW setting.
Drop batter by spoonfuls onto hot waffle iron. Bake (press??) for 3 minutes.
Open waffle iron and gently remove cookies with a fork. Place on waxed paper or racks to cool.

When cool, melt together to make a glaze of:
4-5 oz. Semi-sweet chocolate chips (No, you don't need a scale. I happen to have one because I have to measure ingredients for my soaps - and my chocolate chips are in a huge glass jar. In the photo above, the few extra chocolate chips to the left of my recipe are to motivate the baker, an essential part of making these cookies!)
1-2 t. shortening

Drizzle over cooled cookies. Place a pecan half on the top of each. Okay, this doesn't look like a turtle now, but I like the pecan effect. You can improvise if you want. :-)

My waffle iron has an inscription etched into the underside:  'Made by Tubal-Cain.' It is ancient and refused to be photographed.

For my gluten-free flour, I keep on hand a ziploc baggie with a mixture of the following flours:
  • 6 c. white rice flour
  • 2 c. tapioca flour
  • 1 c. potato starch
That way, I've always got a GF flour ready to use for cookies and cakes.


This post is linked to Tempt My Tummy Tuesday
and Tuesday Tag-Along

Tuesday, July 27, 2010

Jicama Salad with Black Beans

I was in the grocery store, looking for jicama for this salad, when I spotted the teenage produce stocker, busy opening boxes of fruit. When I asked him if they carried jicama, he looked as though he were trying to translate that into something which was in his vocabulary. I told him it started with a J, thinking that might help. It didn't. 

'Nevermind, that's okay,' I said, and continued looking for the elusive vegetable. Eventually I did find it, on a shelf near the floor, under the onion bin. I'm still puzzled by that.

 
The lowly jicama
This jicama salad with black beans is a delicious summer salad I changed slightly from a South Beach recipe.

Ingredients:
1 small jicama, pared (or is it 'peeled')* and diced
1/2 red onion, diced
1 can black beans, rinsed and drained
2 handfuls of fresh peapods, cut on the diagonal
1 can petite diced tomatoes or 2-3 large tomatoes, diced
2 t. finely cut cilantro
3 T. fresh lime juice (juice from 1 small lime)
1 t. cumin
1/4 c. extra virgin olive oil
coarse ground black pepper
sea salt

In a large bowl, whisk olive oil, lime juice, and cumin.  Add remaining ingredients and mix. Sprinkle with ground black pepper and sea salt. 

As a side dish, this should serve 8-10 people. If you're looking for something with lots of COLOR and CRUNCH, this is definitely it.


* pared vs. peeled:  Here's my theory - It just seems right (in other words, I have absolutely no proof) that you peel something that can have its skin removed with your fingers - like a banana, an orange, and a grapefruit. You pare something that has a skin that requires a knife or 'potato peeler' ?? to remove it, e.g. a potato, an apple, or a jicama.


So, what do you think? Feel free to weigh in on paring or peeling the jicama. :-)


This post is linked to Tempt My Tummy Tuesday
and Tuesdays at the Table
and Tuesday Tag-Along


LinkWithin

Related Posts with Thumbnails